Git for the .NET Developer: Part 4 – Git Core Concepts and Commands

Git is just like most technology and can be intimidating until you know it. The point of this post is to introduce the very basic core concepts and commands of using Git, particularly in the Windows environment, to rid the initial anxiety. This posting is not intended to provide turnkey training on using Git, as that is not practical for a blog series… however, it will enable you quickly move into other great literature on getting starting with Git that address the larger feature set. When you are ready to attack the larger feature set of git, I would start with the free online book here http://git-scm.com/book/en/Getting-Started. NOTE: Before continuing this article you will need Git setup in the PowerShell environment or have the Windows Git Bash installed. If needed, see our previous post for instructions on setting up PowerShell.
Git Init Command
The first thing you need to know is how to start a Git Repository to begin track changes to files. With that said, any folder in your Windows environment can become a Git Repository and it is easy to set up. All you have to do is navigate to folder and run the command git init

Now if you open the folder you just initialized (type “ii .” and hit enter in PowerShell), let’s look at what happened (NOTE: you will need to show hidden files and folders in your folder options):
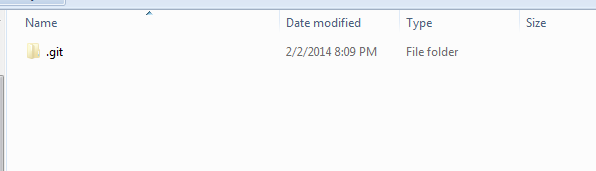
A hidden folder named .git has been created. Simply put, this is where Git stores configurations and is your local copy of the database of changes to the repository. If you dive into that folder you will find file named “config”. This is your repository specific configuration file and, for the most part, the only item you will manually editing some time in the future. An example reason you would edit this file is if you wanted your repository to use SSH vs HTTP authentication with a remote repository, such as hosting on Github.
Git Repository Essentials
After your project is initialized, you can now start adding files to track changes. But before we go there let’s understand a few basics. In Git you start off with the default ‘master’ branch and that is the only branch that exists (NOTE: If you have Posh-Git installed then this is highlighted in the command prompt). All changes you currently make are against the ‘Master’ branch. Because Git is a distributed version control, all the changes you make to ‘Master’ are only seen by you and are stored in your local Git repository. With Git commands, you can query these changes, edit them, combine them, etc. and no one else will know about these changes until you choose to share them remotely.
If you are working with others, then you would want to share your changes remotely. Once you choose to share your changes, you are essentially pushing copy of your Git Repository out remotely for others to download and sync against (see Git Push command). Once you share your local repository changes, then others working on your repository can choose to download your changes to the ‘Master’ branch and their local Git Repository will be updated accordingly (see Git Pull command).
When you download others updates (see Git Pull command), if you have file update conflicts between what your local changes and those of others, then you will need to manually handle these merge conflicts. Git will open automatically open a 3 way merge tool for you to select the appropriate changes to use (See Git Mergetool command).
With this background of the Git Repository, you are ready to learn about the multiple states a file can be in.
Git File States
An important thing to know about Git to even get started using it, is to know about states files can be in. Here are states:
-
Untracked (Working Directory)– These are files in your folder that are not tracked and will not be version controlled
-
Untracked Changed (Working Directory)– These are files that are currently untracked but Git has identified them as changed
-
Changed (Working Directory)– Files that have been changed that currently being tracked (i.e., files that are currently being version controlled)
-
Staged (Staging Area)– Files that are now staged to be committed. This is always relevant, but primarily only useful when you only want to commit a subset of changed files
-
Commited (Git Repo) – File changes that are committed to your local repository.
I cannot stress how important it is to know these states exists and know the following applies: -
Only tracked files can be moved to stage
-
Only staged files can be moved to committed
-
Only committed files can be pushed out remotely for others to download into their Git Repositories
Understanding these states, you are now ready to learn the basic commands.
Git Status Command
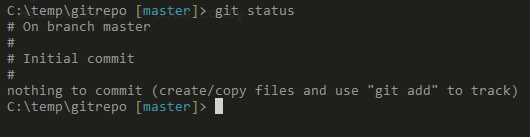
The ‘status’ command allows us view all currently changed files in the repository and what state they are in. If I run this initially, I get a “nothing to commit” message.
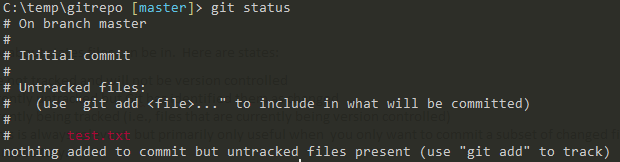
If I add test.txt file to the repository I now get an “Untracked file” message for test.txt
You will use the ‘status’ command constantly to see what you have edited and know what state files are in.
Git Add Command
Files added to the repository are initially in the “Untracked” state. To start tracking file changes you need to use the git ‘add’ command. With this command you can track files by listing each individual file to track or add all current files to track all current untracked files.
git add .will start tracking all files currently untracked or move all tracked files to stagedgit add [filename]will start tracking the file named or move a tracked file to stage
I am going to start tracking the test.txt file as follows and show the post git status results:
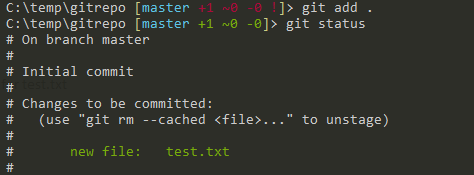
Note, once I added the test.txt file it automatically placed the file in the staged state and is ready to commit.
Git Commit Command
The git ‘commit’ command is very similar to the check-in concept if you are use to using TFS. The ‘commit’ command will take items in stage and store them in Git Repository as a group of changes. Additionally, you can supply a message to identify what the change made was.
To commit our current blank text file, I will run the ‘commit’ with –m flag which is the commit message.
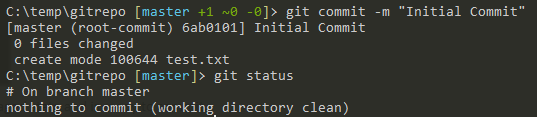
Here I have committed the file with the message “Initial Commit” and the post status is “nothing to commit” because we now have no current changes in folder.
If I now open the file and edit it and run ‘git status’ then you will note that we have a tracked changed file, but note that it is not staged to be committed.
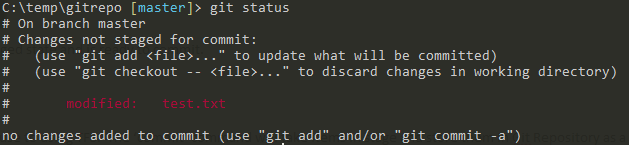
I can either stage a tracked changed file (i.e., modified file that is currently being versioned in the Git repo) by using the ‘git add ‘ command or use –a flag with ‘git commit’ command. The –a flag command comes in handy so that you can commit tracked changes in one command.

Above I added the changed text file to stage and committed it with a message in a single line. If there would have been multiple changes then I would have committed all them with message.
Git Log Command
To see your commit history you can run the ‘git log’ command.
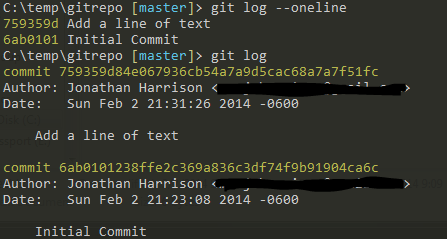
You can see the commit message, who committed the change and the date. The log command has a lot of flags that will change the format. For instance the –oneline flag will display the message on one line.
Git Push Command
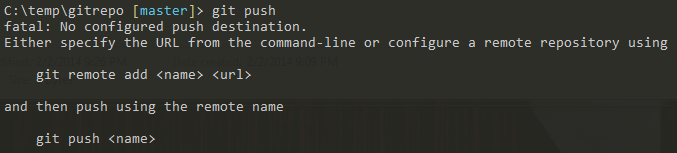
So you have you made your changes and commits and you are ready to share them with the world. Well to do so you need to have a central git server repository. If you refer to the second post in this series it shows how to initialize a repository on Github easily. With this setup, all you need to do use ‘git push’ to send your git repository to Github (or any other remote server/service that you have setup as your destination). If you are not configured with a destination server then you will get the following
Note if someone has pushed changes before you, then you will get prompted that your currently behind. You will need to use the git push command prior to being able to push (this is to make merge conflicts are handled before you can push your changes).
Git Pull Command
The ‘git pull’ command will download all the changes on the remote server that everyone else working on the repository has pushed. If another user has only committed changes to their local git repository and not pushed them to the git server then you will not get these changes (i.e., they have to push these changes to see them).
Git Mergetool Command
When you pull down changes then you may get notified that there are merge conflicts with the changes you have made to files and the files that you have just download and synced with your local repository. To resolve these conflicts you will need to run the ‘git mergetool’ command. This command will open the configured merge tool. Assuming you are working a Windows environment you can actually change to merge tool something with a nice GUI like p4merge (free), Beyond Compare, or even Visual Studio (2012+). A quick Google search will yield instructions on this.
Wrapping Up
You are now equipped with the basics to use Git via the command line in the Windows environment. For a small projects with 2 or even 3 simultaneous developers using a single ‘master’ branch with the commands above can definitely get you started. Git is really powerful and there are lot more features (especially the branching concepts) so I highly recommend the free git-scm.com online book as a follow up resource. This book should be a lot easier to consume with this background. To end this series, here are few other commands I use day-to-day that come in-handy:
- git reset –hard : this will delete all current changes you have made to the repository post latest commit (WARNING: it will delete changes)
- git clean –f : this is telling git status to quit showing the current untracked files… works great for files you know you are not ever going to track
- git log –pretty=format:”%s (%an, %cd)” –graph – this shows a visual graph of commits in the command prompt!
- git diff – shows changes to files right in the command prompt. I actually use this command in combination with other commands to view changes in the command prompt but I’ll save that for another post.
- git stash – allows you to put aside your current changes and bring back (i.e., pop) when are ready to work on those changes again (similar to shelving pending changes in TFS).