Git for the .NET Developer: Part 2 – Setting up Git Environment for Windows (GUI Style)

First off, note that Git is a distributed version control and you have the entire version history stored on your local machine. This is different compared to central version control systems, like TFS, where you only have a local copy of the latest files and the versions are stored on a central server. With that said, that local version history is stored in the same folder as the files you are tracking (i.e., version controlling) and is essentially a database referred to as a Git Repository (or Git Repo). There are two primary ways to interact with a Git Repository: using a GUI or command line. The easiest way to start using Git on Windows is by installing a GUI. This post is about using a GUI to interact with Git which will be followed by a post on using command line.
There are several GUIs out there that can be used to work with Git repositories in Windows. Functionally, you can argue over these tools, but from a polish perspective the Github for Windows application is a hands down winner. This tool comes from familiar ex-Microsoft employees now working at GitHub. The tool is a quick download and install from the Github page http://windows.github.com/. You will need to create a Github account in the process if you don’t already have one.
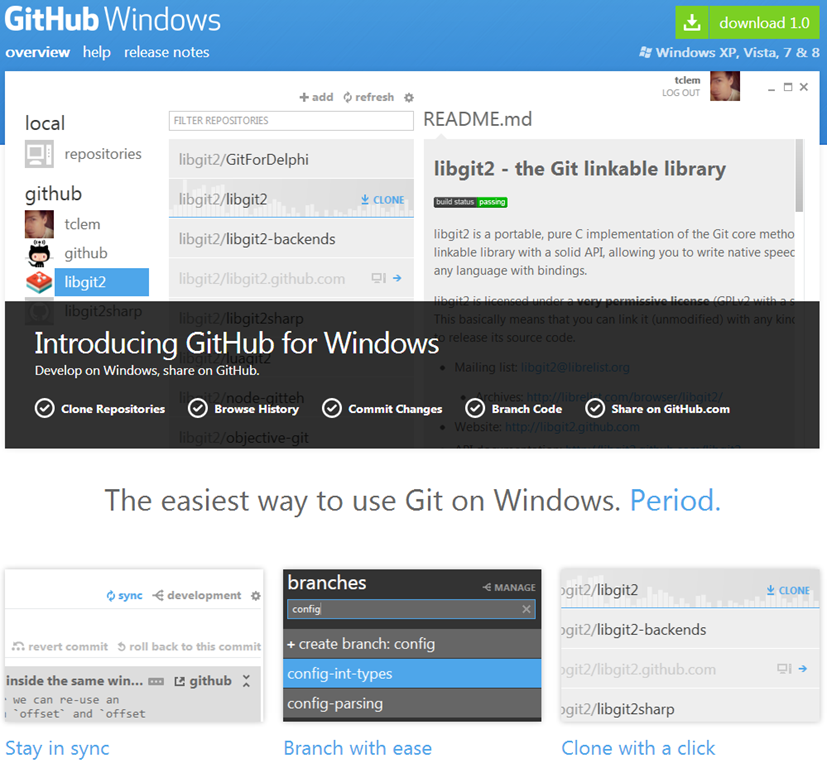
With this tool, you can easily work with a Git Repository (local or remote) in a fashion you should be accustomed to. For example, you can edit files, the tool will automatically detect/display the changes you made, and then you commit your changes with a comment. Refer to the Github for Windows help page for list of features packaged with the tool. Some technical notes on the tool is that it is a .NET WPF application that utilizes the popular Windows Git appliances libgit2 and msysgit to interact with Git Repositories. The tool is a click-once application and stores its components in the AppData folder.
So let’s quickly walk through two basic tasks you will perform to get started using the tool: cloning a remote repository and creating a local repository.
Cloning a Remote Repository
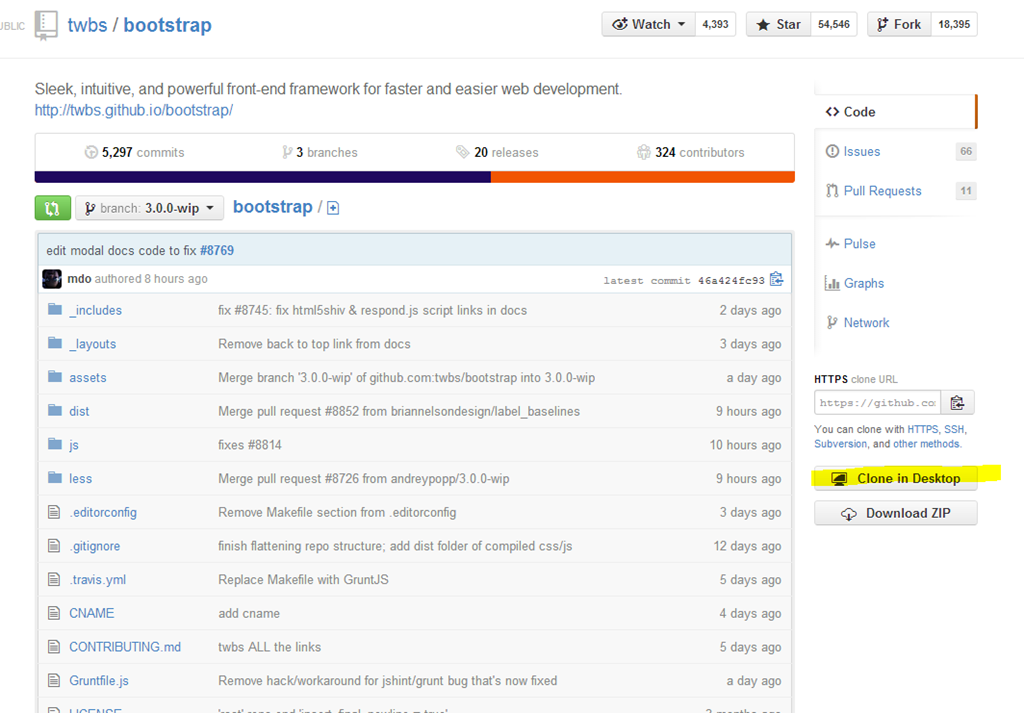
Cloning a remote repository is copying down the Git Repository from a remote source. A remote source is typically a Git service provider (e.g., GitHub or BitBucket) or a server host Git on the network. Since this is a GitHub for Windows tool, it makes it dead simple to clone repositories on GitHub. Let’s clone the popular open source CSS Framework Bootstrap (formerly Twitter Bootstrap).
First go to the GitHub page https://github.com/twbs/bootstrap. Now look for “Clone in Desktop” button (highlighted below). Click this button which will prompt you to launch the Github for Windows application. Once you approve, Github for Windows will launch and automatically download the Bootstrap Repository.
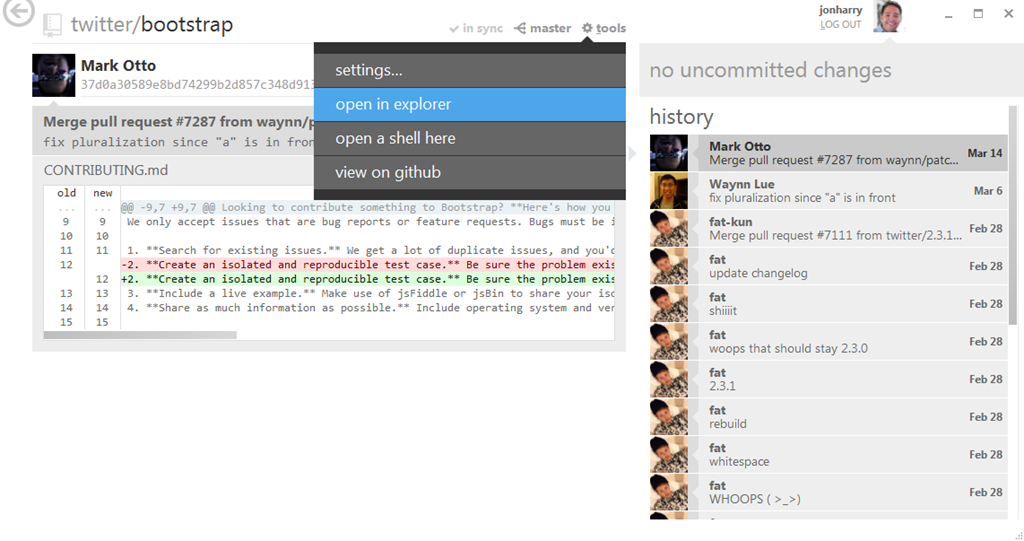
Once Github for Windows completes downloading the Bootstrap Github Repo, you can click on the project and easily view all the commits to the project. The application also allows you to quickly open up the folder containing the project or accessing the command line via the tools menu.
Congrats. You now have a Git Repository on your local machine. Before moving on, let’s think about what is going on. So in the background the tool downloaded a set files including the Git Repository. The tool then is reading from the Git Repository and gives you a nice GUI presenting the data, such as, view the commits. As you need to clone GitHub repositories in the future, this remains the easiest way to.
Creating a Local Repository
A Git repository is a great way to version control local files and it is simple to do. This combined with a cloud drive like Dropbox makes for a great source control solution for a single developer project. Besides source code, you can version control anything stored on the file system. For example, if you were writing a story in a Word Document you could commit changes frequently and roll back and forth between commits. You could even branch the story with alternative endings or plots.
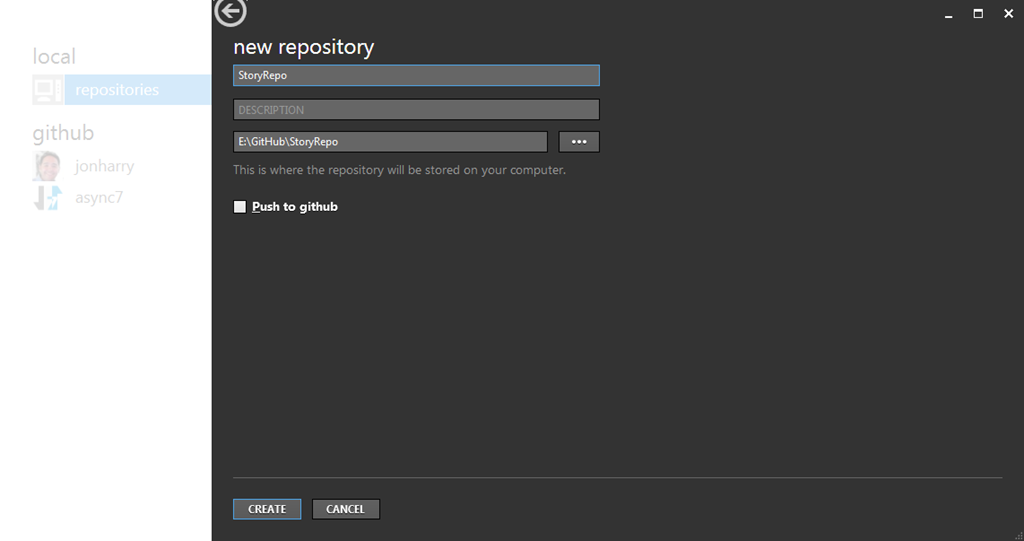
Using the Github for Windows, does all the dirty work for us to create a Git repository. Just open the application and click the “+ create” link

Enter the name of the repo and click create (you can check “Push to github” if you want to automatically have repo hosted on Github… just note that the repo will be public if you are using a free account).
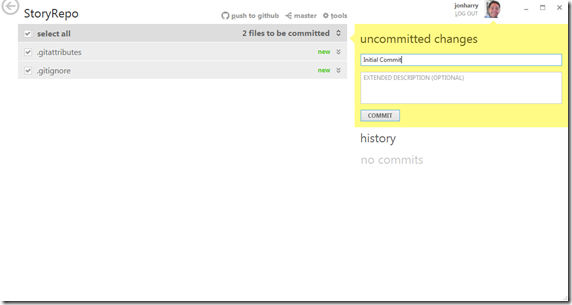
Now find the created repository and click on it. You will notice “uncommitted changes” is highlighted in yellow. This means that you have files that have been changed that can be committed to the repository. Type “Initial Commit” where it reads the “COMMIT MESSAGE (REQUIRED)” as the placeholder.
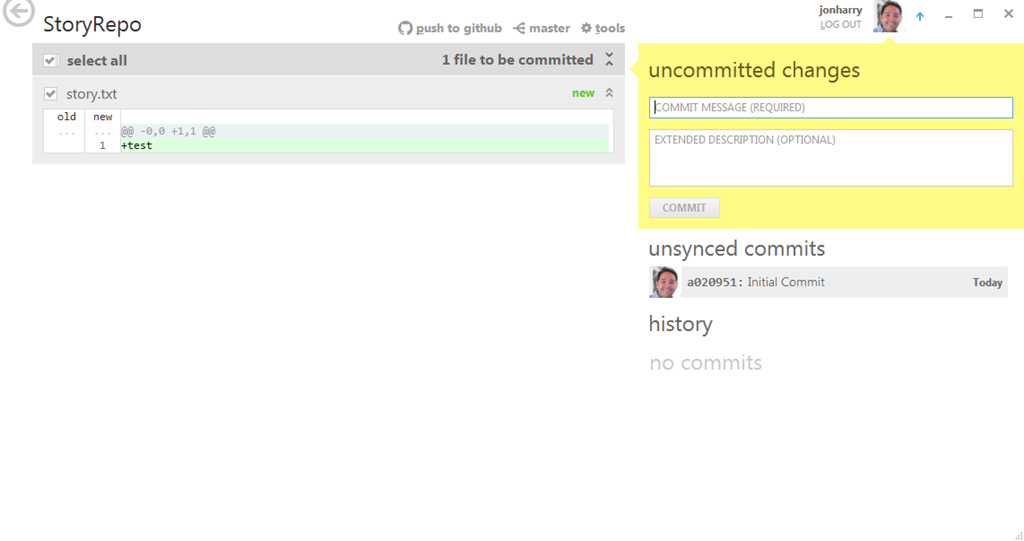
Now open the repository in the explorer by going to tools > open in explorer. Create a text file in the opened folder called story.txt, open the file and add the text “test”. Now look at the GitHub for Windows application and notice that “uncommitted changes” is highlighted blue. Click the “Show” button next to “uncommitted changes” and you’ll find that it shows change “story.txt” file has changed and the line “test” was added (signified by the green).
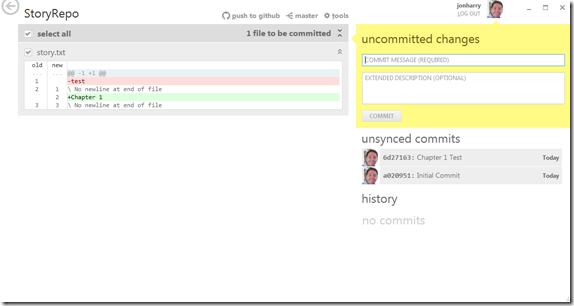
Add a commit message “Chapter 1 Test” and click commit. Now go edit the file again…. this time delete “test”, add the line “Chapter 1”, and save the text file. Now see you can see the how the changes are shown in the GitHub for Windows tool. This “test” is shown in red with a minus sign at the beginning of line meaning the line was deleted.
Commit this change with a comment. Now play around with adding and removing text, committing the various changes. I also recommend experimenting, such as adding new files to the repository. Then click the “revert commit” to undo the selected commit (notice the commits are still tracked) and “roll back this commit” to get rid of the selected commit (notice the commit is gone). You’ve now gone novice on using Git as a version control system.
This post introduces the very basics of getting started with Git using the GitHub for Windows application. You can go pretty far using just the GUI, however, the application does such a good job of abstracting away what is going on behind the scenes that it makes it difficult for someone new to Git to understand really the how or why to use it. An example, understanding what happens when you click “revert commit” and is that really what you wanted it to do. Further, one day you will be using the GUI and get some random error like “DETACHED FROM HEAD” and will have no option but to fire up the command line. But do not fret… in this case the command line is your friend, not near as complicated as you would assume, and with a little guidance may even become your preference. In the next post we will discuss setting up the Git environment for Windows using the command line.